DASHBOARDS
About Dashboards, Widgets & Filters
Dashboards are composed of a curated collections of Configurable Widgets, designed to display events, track incidents, dispatch solutions, allocate resources, and deliver Filtered Reports. You can also generate AI summaries of issues and events to report out.
-
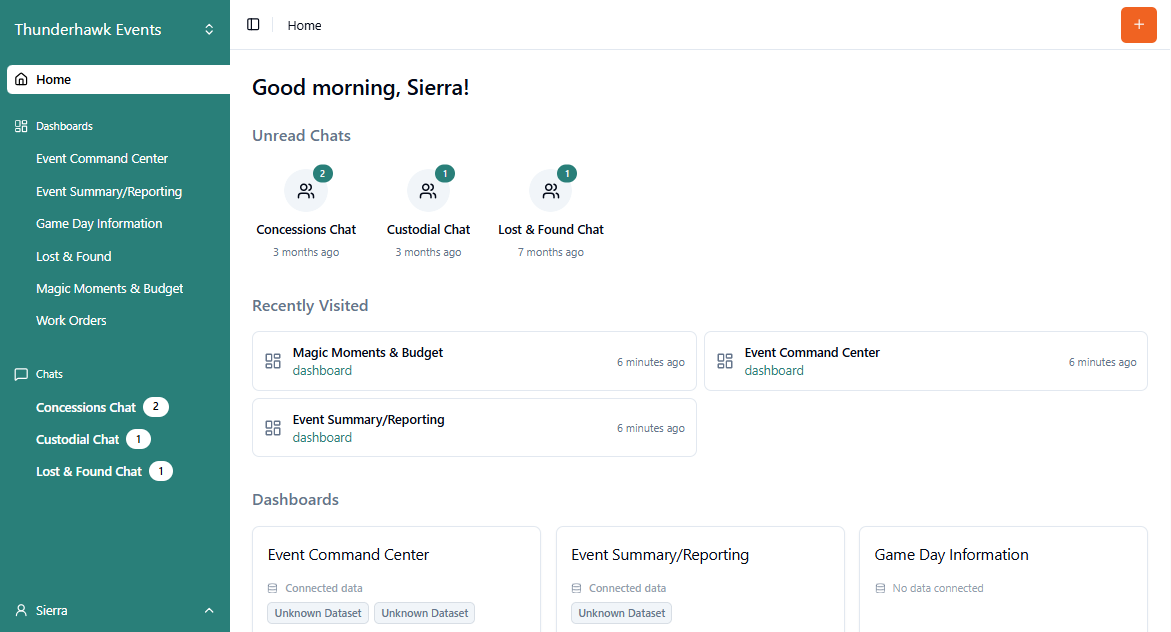
Click Home:
- Open your Dashboards from the tiles → or from your Navigation panel
- Respond to any Unread Chats
- Link quickly to your most Recently Visited resources
- Launch Forms immediately by clicking the +Orange button
Dashboard Creation & Design
- Want to be a Dashboard guru, then here are four important articles to visit:
Design for Analysis
Before you start creating new Dashboards, think through the data you wish to see and how you want to slice-and-dice your Records for analysis.
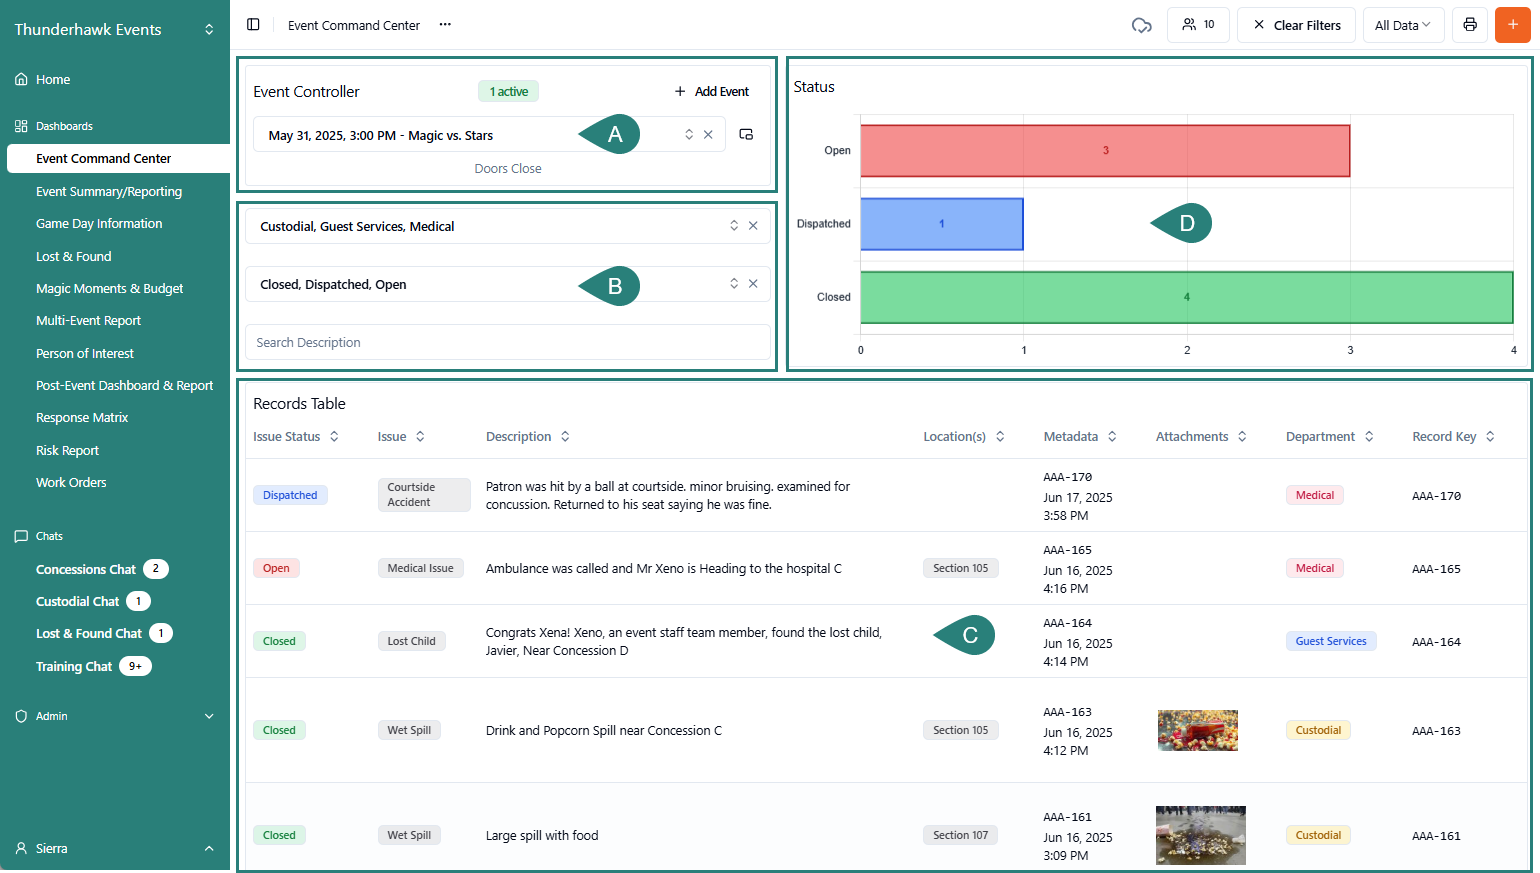
For instance, in our below Command Center example we've built in:
- A. An Event Controller → Select Events by Date and Name, and track progress with Event Markers
- B. Multiple Filters → to track progress or status, isolate issues, or search description fields, including:
- Two Select Filters → ex. Department and Issue Status
- One Text Filter → ex. Search Description
- C. Records Table → Track any or all the entry types made for each record
- D. Bar Chart → Add Bar Charts to track any drop-down selection or Progress/Status Records
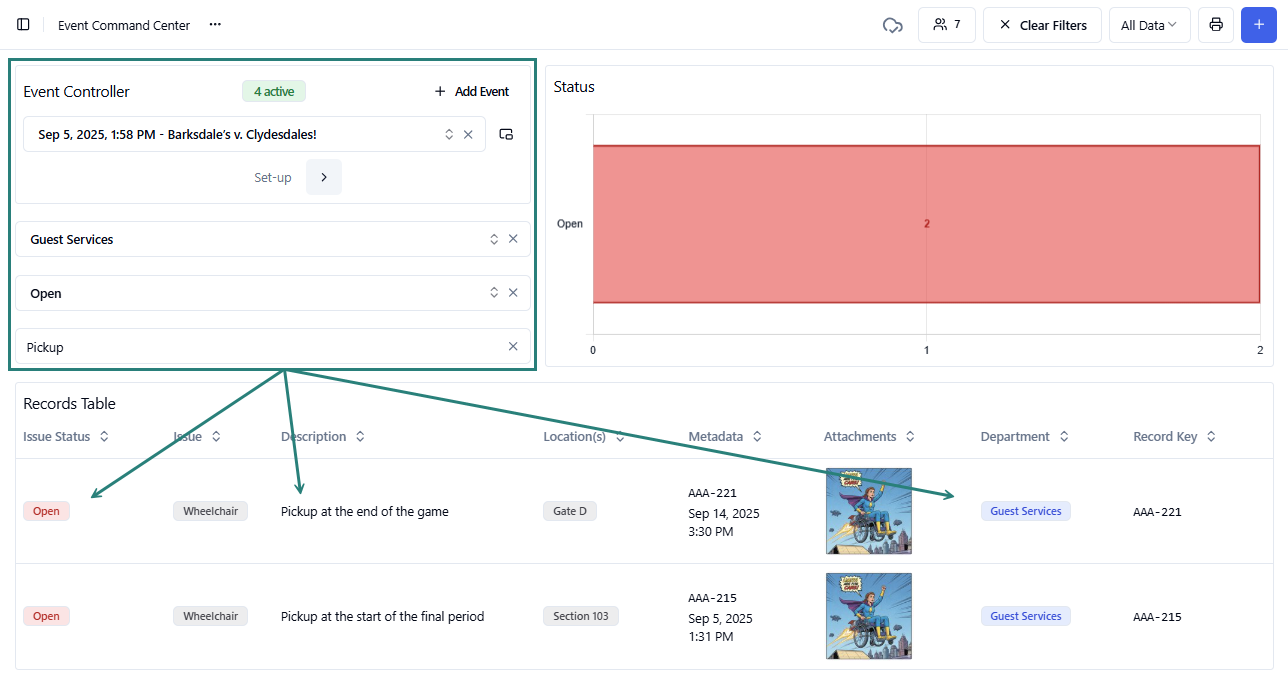
Applying your Widget Filters can dramatically refocus a Dashboard, and by extension your Reports. For instance, in this filtering we are only looking at Open wheelchair Pick ups by the Guest Services Team.
-
If you click the green Active button

-
You'll pop immediately to your Active Event

• Share your Dashboards!
-
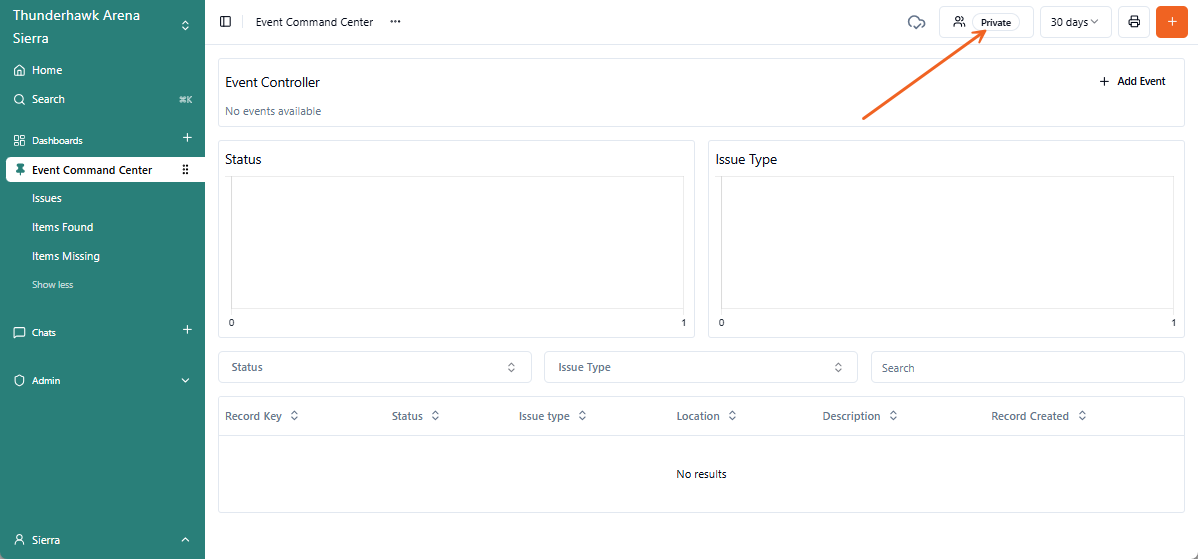
If you see the Private button, only you can see the Dashboard

-
Visit our complete Share Dashboards article
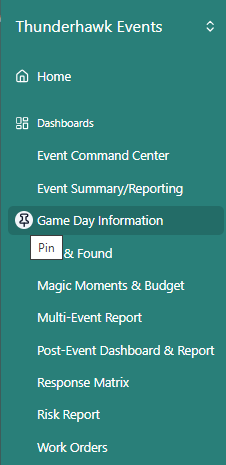
• Pin your Dashboards
Use Pins to declutter your Navigation panel:
- Pin desired Dashboards and Chats, sending them to the top of the list
- Reorder them anytime by dragging their Waffle handles up or down
- Unpinned items are hidden but are accessible by clicking Show more
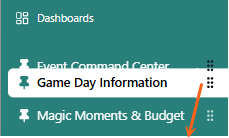
To pin and unpin your Navigation Panel Resources:
-
Hover over any Dashboard (or Chat) to reveal its Pin → ex. Game Day Information_
-
Click the Pin!
-
Pin additional Dashboards (or Chats)
-
Click and drag the waffle icon up or down → to reposition the pinned Resources
-
Reverse the process to remove Pins
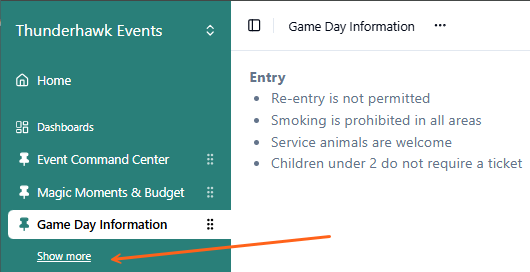
Show more / Show less
-
Click the Show more → to display the unpinned items
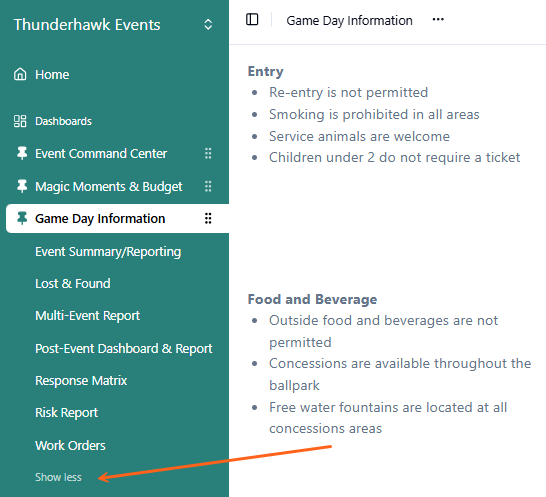
-
Select Show less → to minimize the list
• Copy/Duplicate Dashboards!
Clone any Dashboard instantly without rebuilding it from scratch! There are a host of excellent reasons to duplicate. Perhaps you:
- Need a personal copy to alter for Reporting purposes
- Want to share a subset of the Dashboard with stakeholders
- Wish to experiment with a few new things without altering the active Dashboard!
Whatever the reason, duplication couldn't be simpler:
-
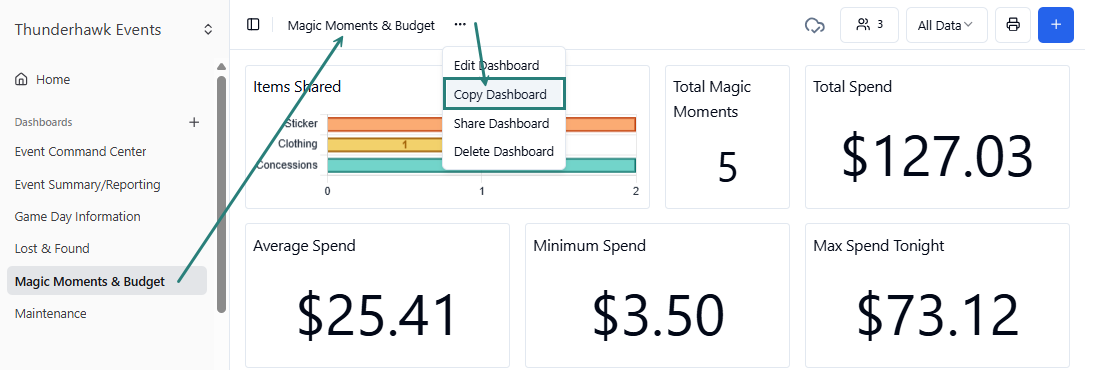
Open your target Dashboard → ex. Magic Moments & Budget
-
Select the Ellipsis (. . .) menu → and choose Copy Dashboard
-
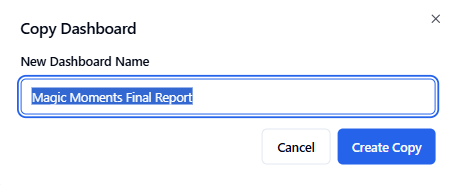
Name the new Dashboard → ex. Magic Moments Final Report
-
Click the Create Copy button
-
See our Configure Widgets article to learn all about customizing duplicate Dashboards
-
Notice that your cloned dashboard is marked Private, and personal to you

- Instructions for sharing your new dashboard can be found in Share Dashboards
-
Jump to our Use Case: Copy — then Customize a Dashboard for a step-by-step example
Use Dashboard Templates
Form Templates create Dashboards too!
- If this is your first experience creating Dashboards, starting with Forms Templates is a good idea!
- Form Templates have been added to help you create starter Forms and their related Dashboards simultaneously
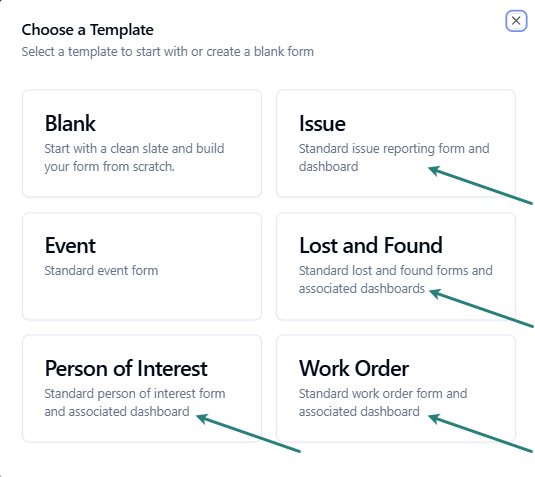
→ ex. Issue, Lost & Found, Person of Interest, and Work Order
- Note: The Event Template prepares an Event Controller Widget that can be added to relevent Dashboards
- Note: The Event Template prepares an Event Controller Widget that can be added to relevent Dashboards
Templates simultaneously create Forms and the coresponding Dashboards.
If you are new to Templates see →
- Issue Form & Dashboard
- Event Form & Event Controller
- Lost & Found Forms & Dashboards
- Person of Interest Form & Dashboard
- Work Order Form & Dashboard
- Blank: Create a Patrol Form From Scratch
- Learn all about Add Event Markers in our help article.
Rename Dashboards & Reports
To rename a Dashboard and its affiliated Report:
-
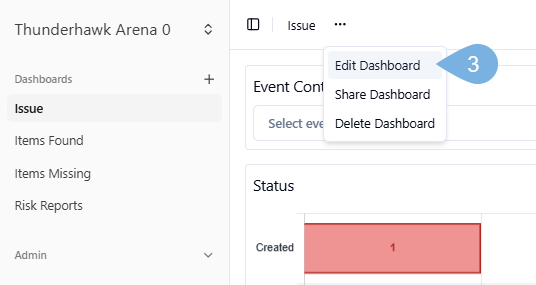
Open your Dashboard → ex Issue
-
Click the Dashboard's editing ellipsis → ( . . . )
-
Pick Edit Dashboard
-
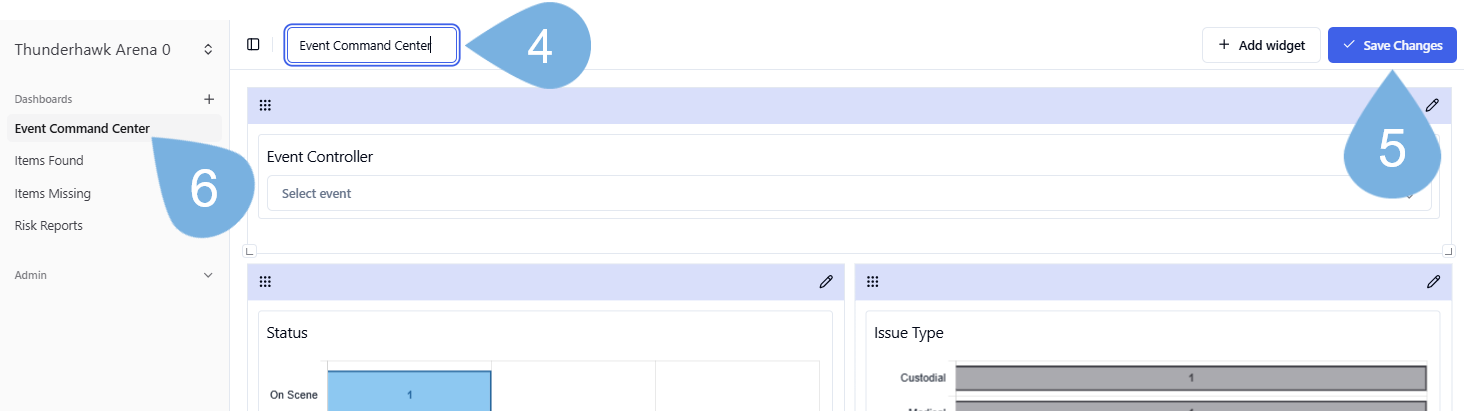
Rename the Dashboard → ex. Event Command Center
-
Click ✓ Save Changes
-
Blink → and the new name will appear in the Navigation bar
Customize a Dashboard
Copy & Convert an Issues Dashboard into an Event Command Center
Let's Copy a templated Issues Dashboard → and then Insert and Configure an Event Controller Widget:
-
Open your Issues Dashboard → then copy it by clicking Ellipsis followed by Copy Dashboard
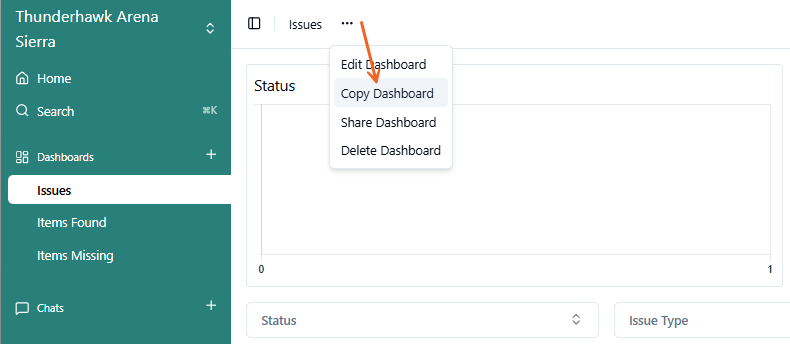
-
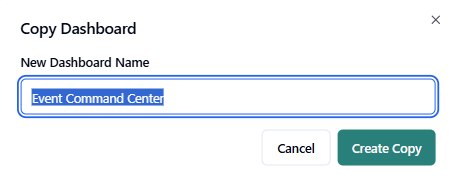
Rename the new Dashboard → ex. Event Command Center
-
Click Create Copy
Add and Position your Event Controller Widget
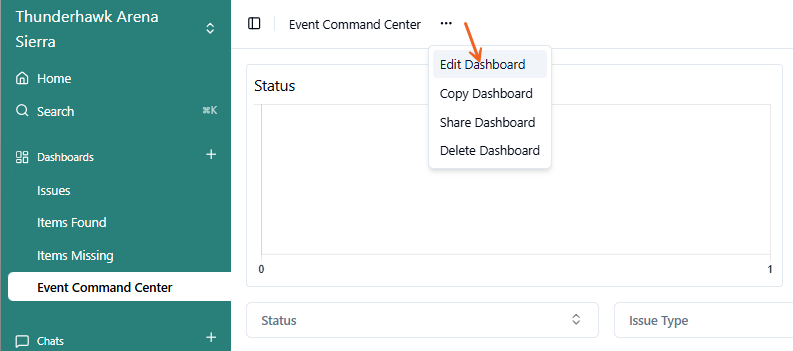
-
Click the Ellipsis (...) menu → and choose Edit Dashboard
-
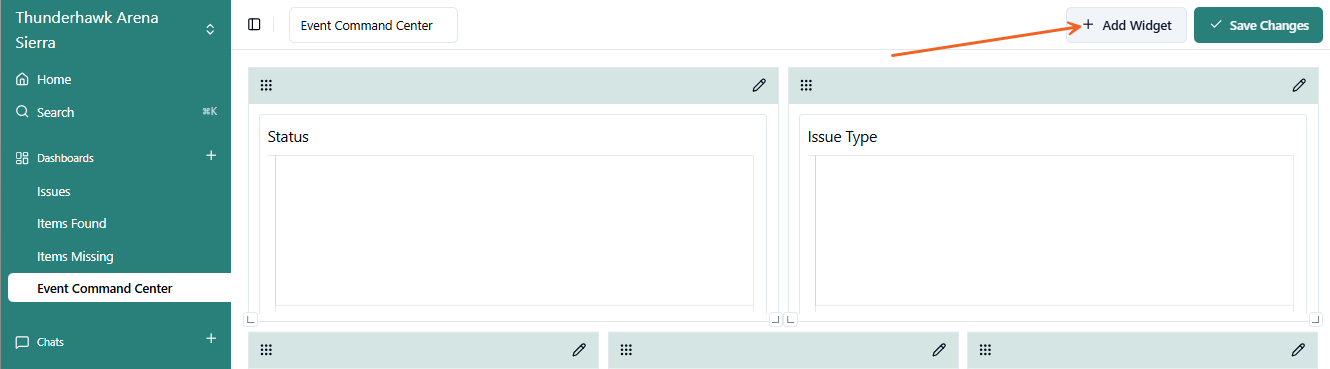
Click + Add Widget
-
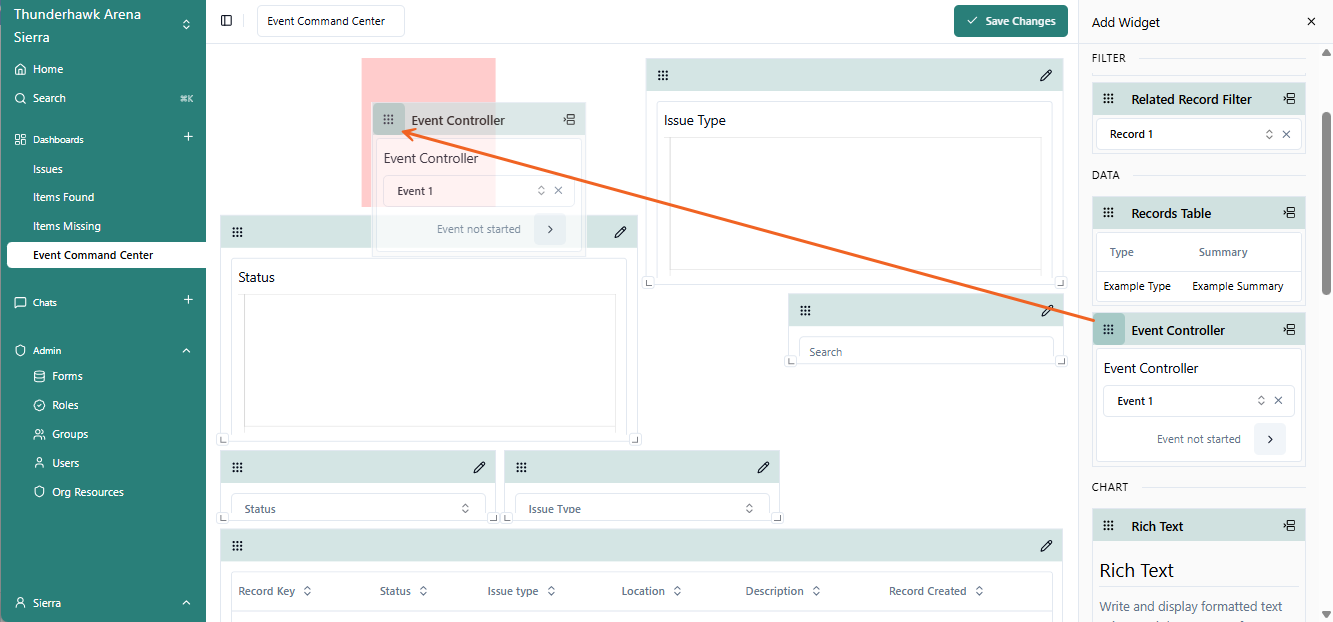
Snag the Waffle icon → and drag the Event Controller Widget to the top of the Dashboard
- (Note: You can also click the Quick Add icon in the top-right corner of the Widget → then reposition the Event Controller from the bottom of the screen)
-
Size and position the Event Controller along the top of the Dashboard
- Drag the bottom-corner handles to make the Widget wider, narrower, longer, or shorter
- Grab the header to reposition the Widget inside the Dashboard
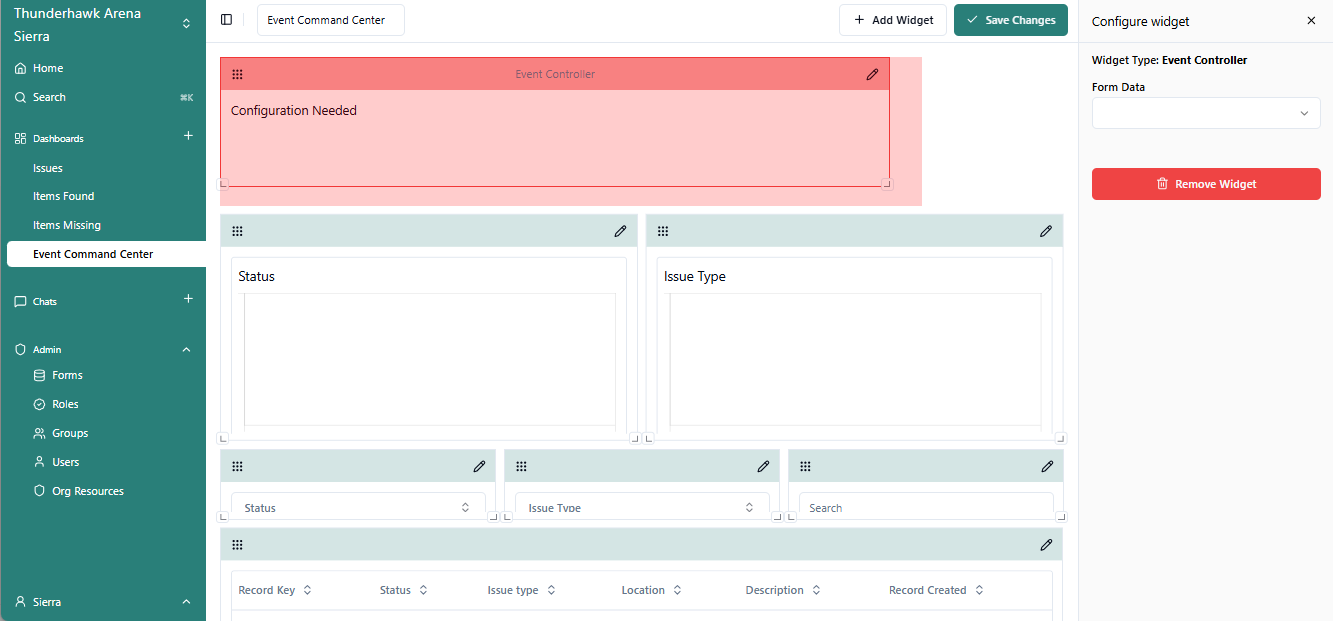
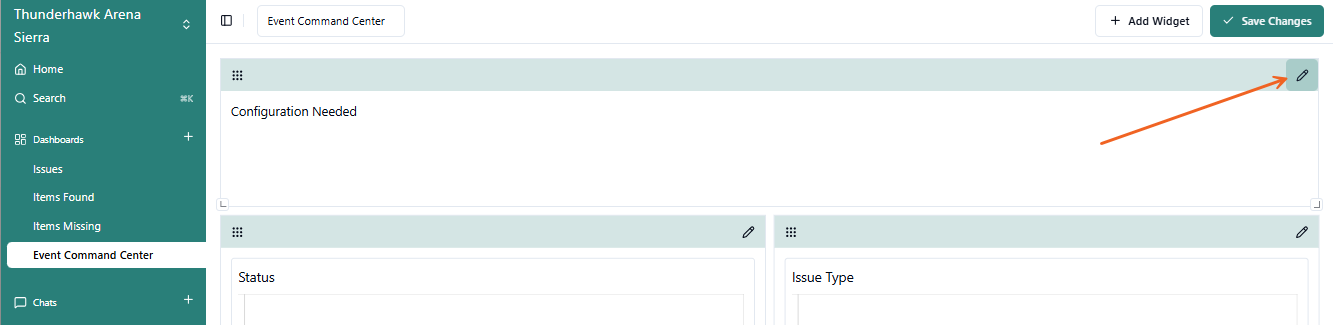
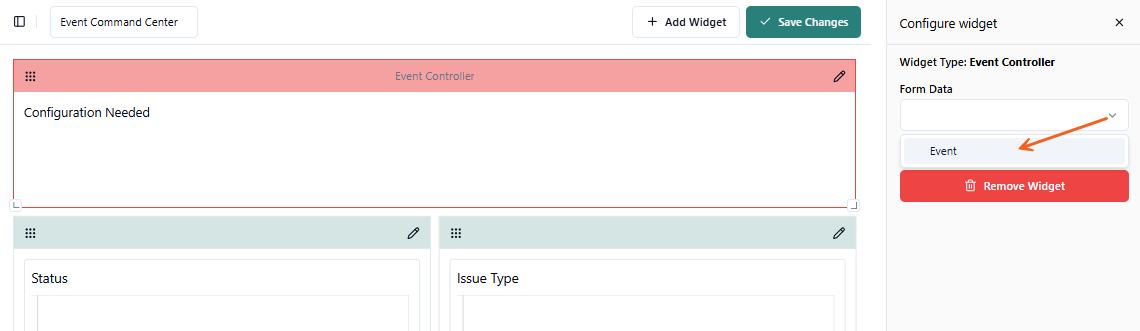
Configure your Event Controller Widget
-
Click the Editing Pencil on the Event Controller
-
Configure by selecting the Event Form → from the Form Data menu
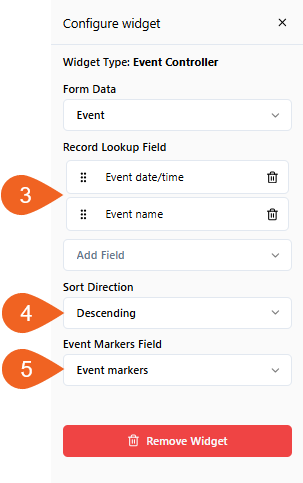
-
In the Record Lookup Field menu →
- Pick Event date/time
- Pick Event name
-
For the Sort Direction field →
- Choose Descending
-
In the Event Markers option →
- Select Add Event Markers
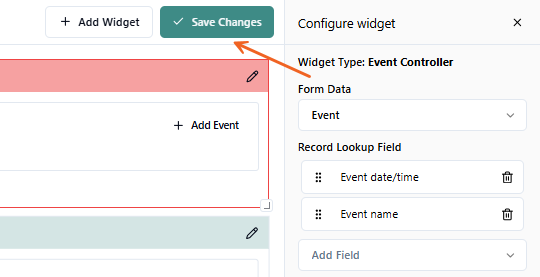
-
Click Save Changes
Associate (Link) the Event Controller to your Issue Form
To organize Issues by their corresponding Events, you need to tie the two together in a neat bow. Doing so will allow your to filter each event separately for post-event analysis:
-
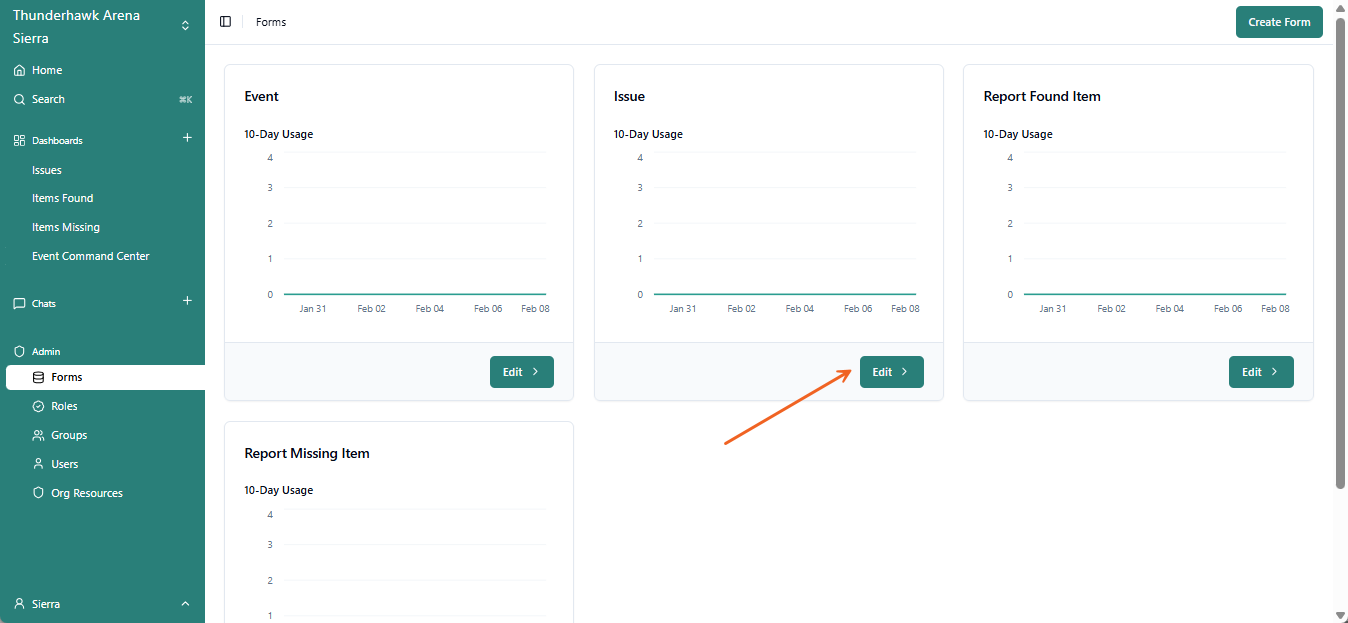
Pick Forms from the Admin menu
-
Open your Issue Form → by clicking Edit
-
Pick Add Field
-
Choose Related Field from the list
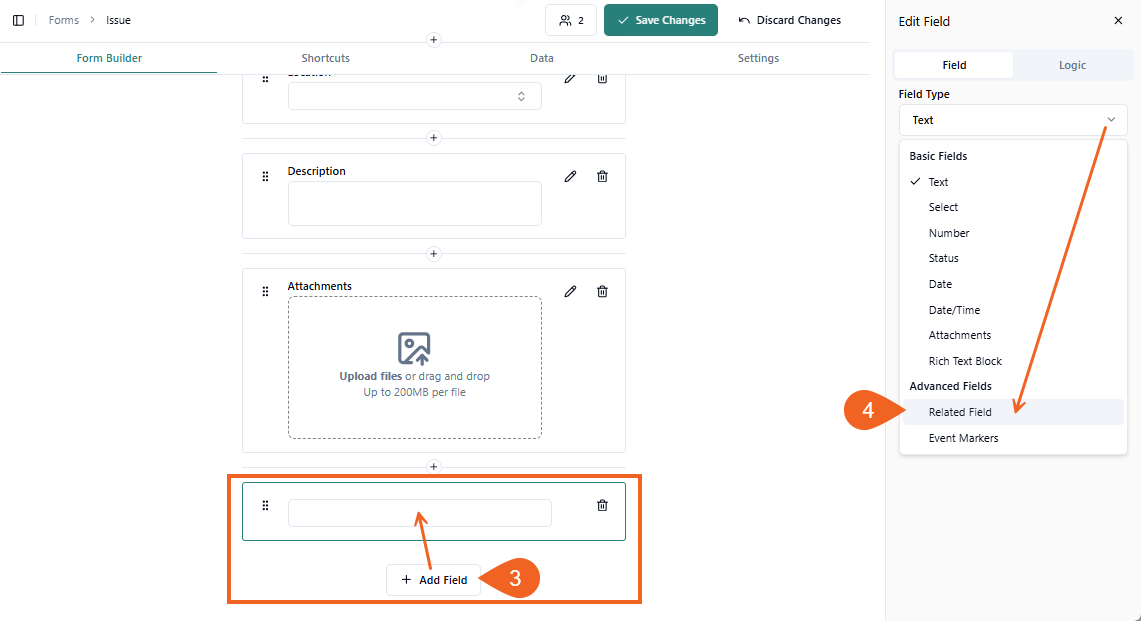
-
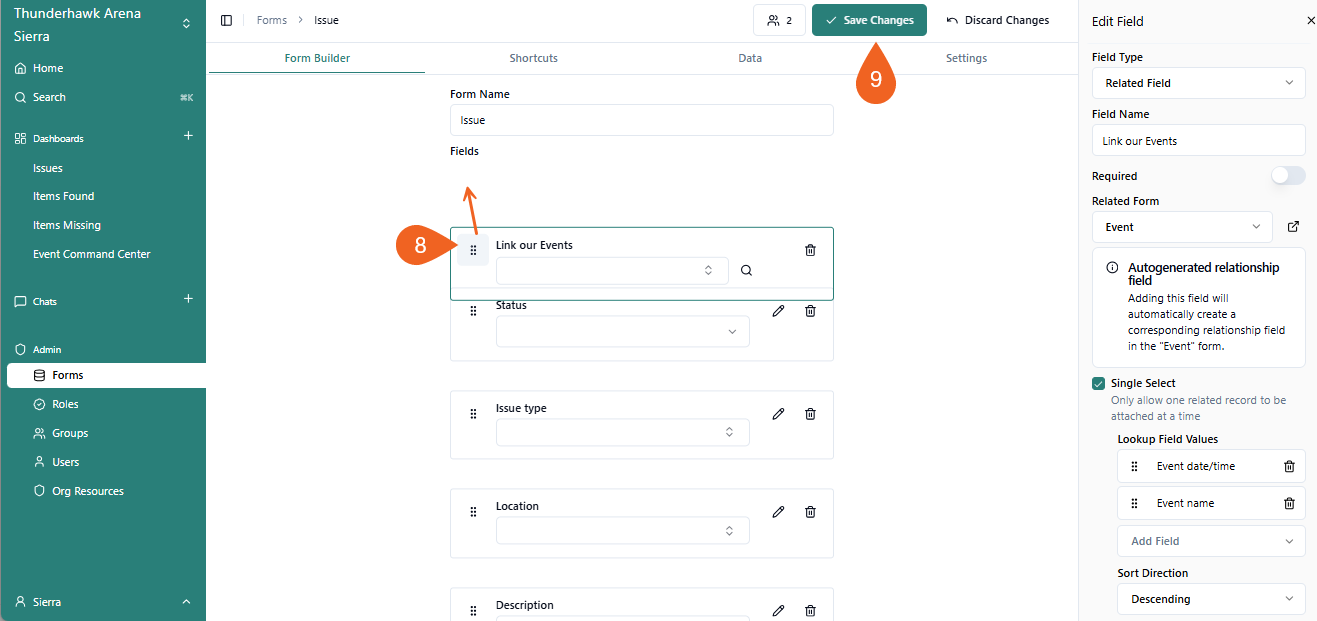
Enter a name in the Field Name box → ex. Link our Events
-
Essential: In the Related Form menu → select Event

-
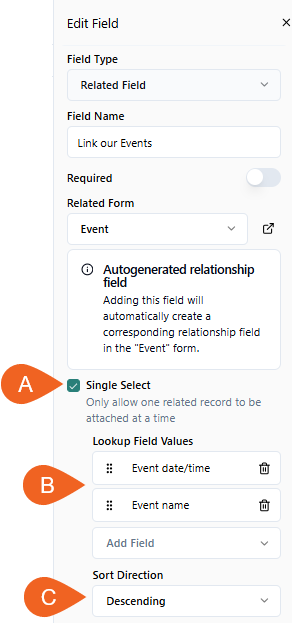
Finish up your Form's settings by picking:
- A. Single Select → so only 1 event at a time can be selected
- B. Lookup Field Values →
- Pick Event date/time
- Pick Event name
- C. Sort Direction → click Descending → so the most recient event floats to the top
-
Drag your Event Controller field up to the top → so its the first thing you'll see in the Form
-
Click Save Changes
Voila!
Albeit, don't foget to Share your Dashboard with your related Groups and/or individual Users → ex. the Guest Services Group